.
How to Get Started with Fleet Management
This page will walk you through the High Level steps on how to create your Fleet in Pilot Partner and get started. Most of the steps in this guide have a lot of options that require their own training guide, but we will cover the basic settings and steps you need to get started. The Steps Include:
- Create your Individual Pilot Partner User Account
- Create Your Fleet and Add 1 or More Aircraft
- Run the MX Wizard for Each Aircraft
- Visit the Configure Tab in your Fleet Dashboard and Edit your Settings & Pilot Groups
- Invite Members
Creating Your Account & The Fleet
Create Your Personal Account
If you don’t already have your own Personal Pilot Partner Account, create one here: Create New Account
With Pilot Partner you don’t need to create a separate account for your club, only your own personal account. The way Pilot Partner works is that your Fleet is a collection of members. You can control which members are Admins and which members are not.
Create Your Fleet
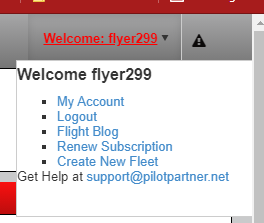
Once you are logged into your Pilot Partner Personal Account, you can create your fleet by clicking your name in the upper right corner and then clicking “Create New Fleet“.
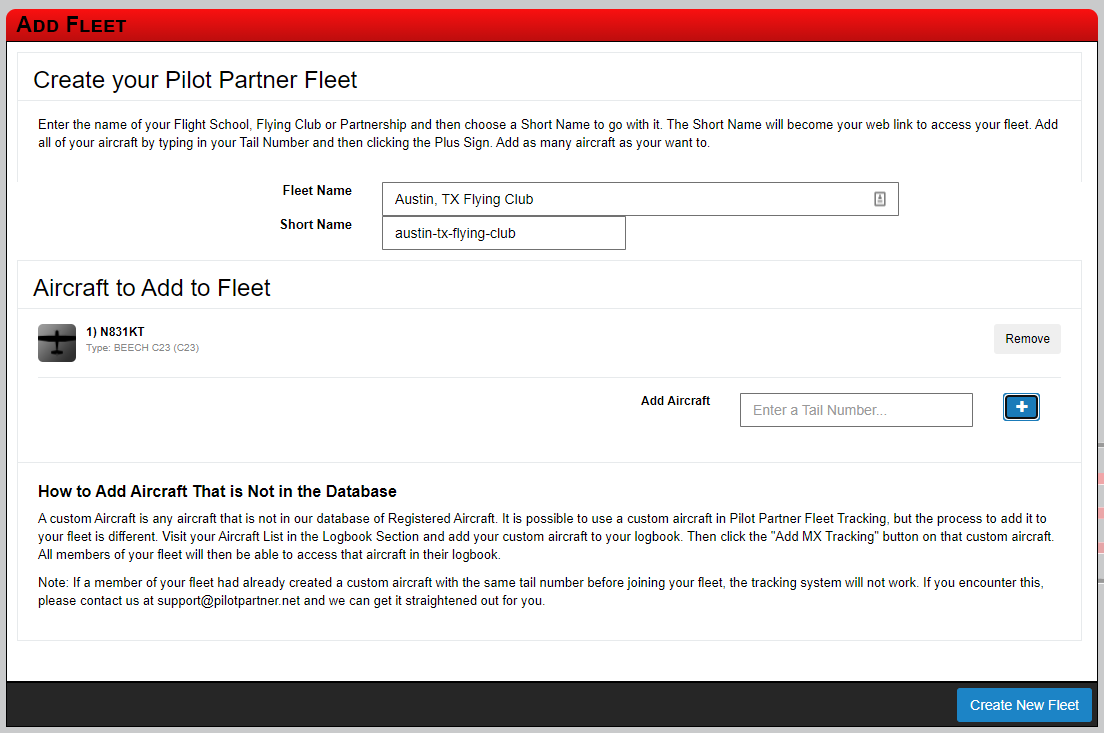
Here you will Name your Fleet, Choose a Short Name and add 1 or more Aircraft.
Fleet Name: This is just a Friendly Name that you call your Flying Club by. This will display to all of your Members. What ever you call yourself, use it here.
Short Name: When your Fleet is Created, your Fleet will have its own custom Web Link (URL) that points to your Fleet Dashboard. This is useful so you and your members can bookmark your Fleet Dashboard and go straight there. The Short name is auto calculated based on your fleet name and most of the time the auto calculated short name is all you need. If you do want to change it to something custom, there are a few things you can’t do. Just follow the instructions on the screen.
Adding Aircraft: Just enter the Tail number of the Aircraft you want to add and click the blue plus sign next to it. Repeat this step if you want to add multiple aircraft. Don’t worry, you can always add more aircraft later as well.
Create New Fleet: When you have reviewed the screen for accuracy, click the blue “Create New Fleet” button and Pilot Partner will do all of the Magic for you.
Running the MX Wizard
This is one of the most important steps of getting setup in Pilot Partner. To run the MX Wizard you will want to have the following available:
- Maintenance Logs of Each Aircraft
- Recent Flight Time Records including: Date, Hobbs Start/End and Tach Start/End
The Goal of the MX Wizard is to configure each of your aircraft for use in Pilot Partner. Pilot Partner works off of Meters (Typically Hobbs & Tach). We need to know what value your Hobbs and Tach current say so we can start Pilot Partner there. In addition to that, we want to allow you to track the basic Maintenance Intervals for: Annual Inspection, IFR Certification, Oil Change, 100 Hour, Engine Overhaul and more. You can always customize and add Maintenance Inspections after the wizard runs. The wizard is designed to get you started with the basics and allow you to adjust what you want later.
Run the MX Wizard
Watch the YouTube Training video at the top of this page, it walks you through in detail how to create your fleet and run the Maintenance wizard.
A few helpful tips are:
- Use Google Chrome as your Web Browser. All Browsers handle dates and numbers slightly differently and we’ve made this page optimal for Google Chrome.
- Use a Big Monitor. There is a lot of information on this screen, make sure your window is as big as possible. If you are still out of room, you can zoom the font smaller in the browser to give you more room. Ctrl Key and Minus will zoom smaller. Ctrl Key and Zero (0) will reset it to 100%
- Always Track Maintenance using the Tach Meter
- Choose if you want to Invoice off of Hobbs or Tach Time
- Even if you have an engine Monitor, don’t rename your Hobbs Meter to something else. Pilot Partner provides the best user experience to your Pilots if you have a Tach or a Hobbs meter, or both by those exact names. Changing Hobbs to “Flight Meter” will make it harder on your Pilots.
- Un-Check any Inspection that you don’t care about. You can always add them back later. You may not care about tracking each Cylinder on the Engine or your Magnetos at this time. Simply uncheck them during the wizard and Pilot Partner will skip them.
Configure Your Fleet
On the Left Navigation of your Fleet Dashboard you will see an option for Configure your Fleet. Here is your main control panel for adjusting how Pilot Partner will behave for all of your members. Pilot Partner works off of something called Pilot Groups. The Majority of all of the settings are found under the Pilot Group page. This allows you to have different types of members that pay different rates and have different rules. It is one of the things that makes Pilot Partner so Flexible.
Things you Will Want to Configure
Fleet Wide Settings
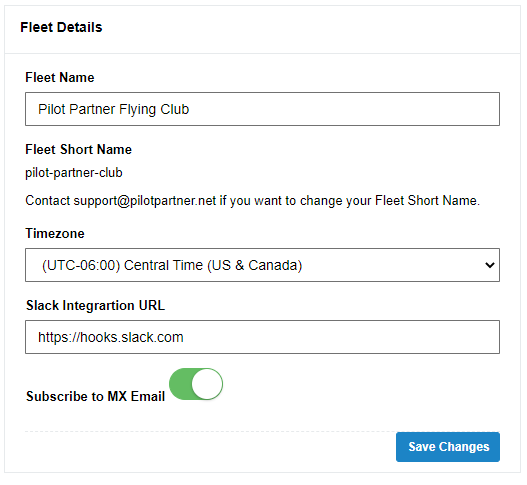
- Time Zone – We’ve set this based on the timezone you were in when you created the Fleet. But if it is incorrect, you will want to adjust it here.
- Trip Types – We will cover this in more detail on this page
- Stripe Payment Processing – This allows you to collect Credit Cards and Bank Transfers through our Automated Payment System.
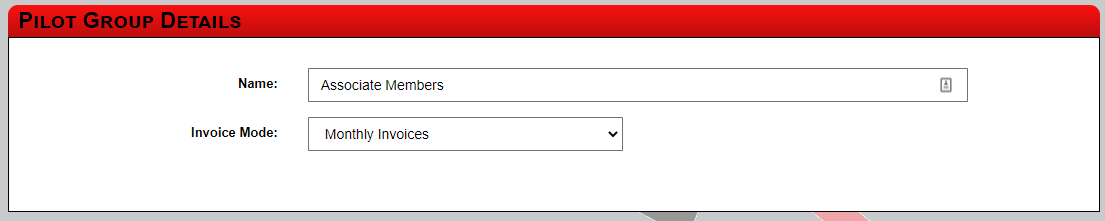
Pilot Groups
- Invoice Mode: Always use Monthly Invoices. There are other options available, but they are more advanced and actually limit some of the features you can use. Contact us if you have questions if another option might be right for you.
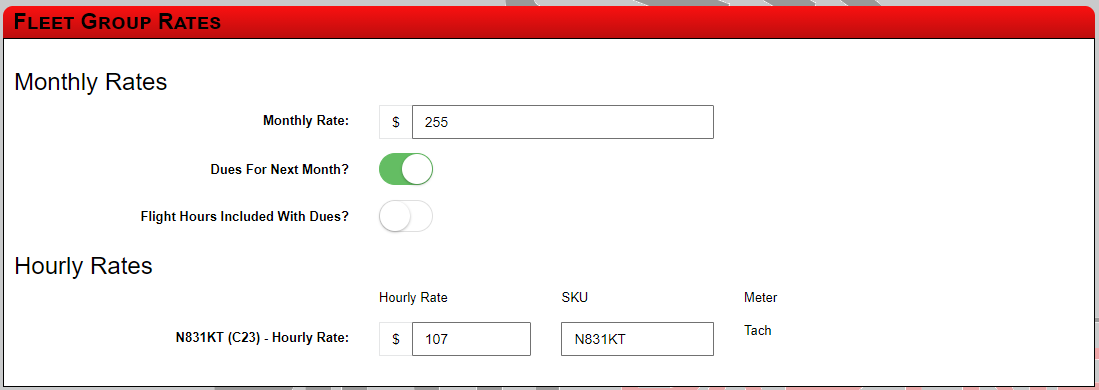
- Monthly Rate: This is the amount you want to charge for Monthly Dues. Pilot Partner will automatically charge this once a month to members in this Pilot Group. $0.00 is acceptable if you are not charging Monthly Dues.
- Dues For Next Month: Almost always this should be set to Yes. It is a simple feature that just adjusts the words put onto the invoice to state the Club is Charging dues for the next month not the month that has just passed.
- Flight Hours Included With Dues: Set to yes if your club includes 1 or more hours of flight with the dues. We don’t recommend setting your club up like this because it can get complicated, but Pilot Partner will track the included hours and apply the credits on the Invoices Automatically if enable this feature.
- Hourly Rates: For each of your Aircraft, enter the hourly rate that a Pilot Should be Charged when Flying this Aircraft.
- SKU – This is used when Quickbooks is Integrated and will control the Product/Service on the Quickbook Invoice for Hourly Flight Time Charged. Just enter the Tail Number of the Aircraft unless you have a specific alternate in Quickbooks you need.
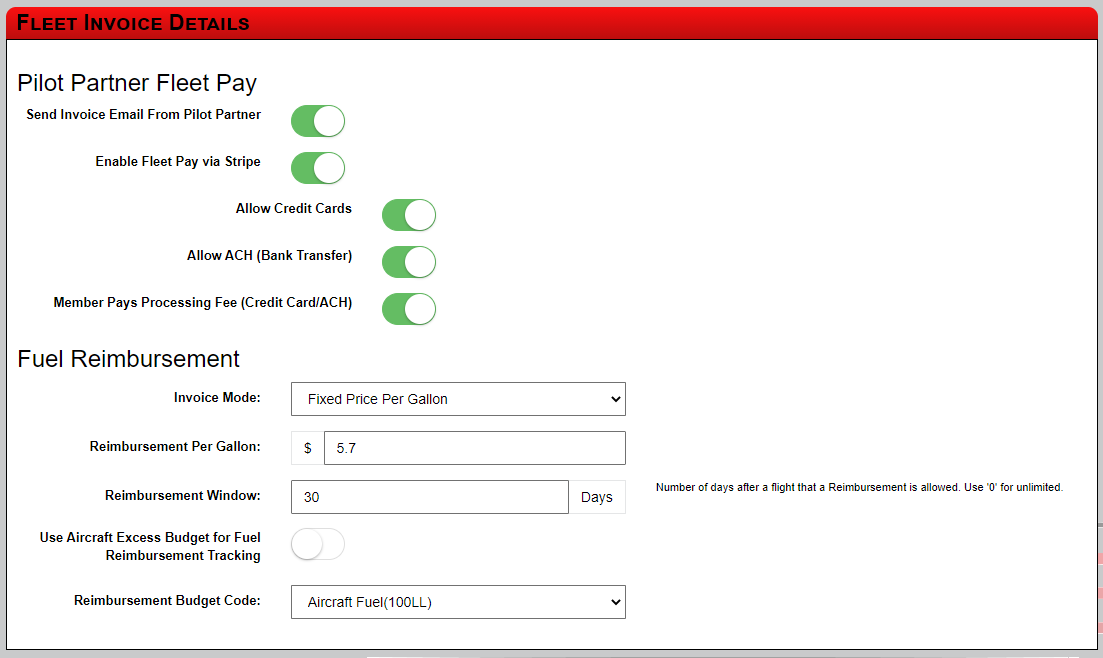
- Pilot Partner Fleet Pay: Set this as you Desire. Note, once you enable the Stripe Integration more Options Show Up here.
- Send Invoice Email from Pilot Partner: This should be turned on unless you are using Quickbooks to manage your payments (not recommended anymore).
- Fuel Reimbursement: You can choose if you want to enable members submitting fuel reimbursements or not and how to calculate the reimbursement. If enabled, you members will be able to submit fuel receipts in the Pilot Partner App & Web Portal attached to their Flight. They are required to enter the Total Gallons Purchased and the Total $$$ Spent on Fuel. Pilot Partner will calculate and apply the reimbursement based on the rules you enter on this step.
- QuickBooks Settings: This is only visible if you have Quickbooks Integration enabled. See our How To Connect Quickbooks Guide.
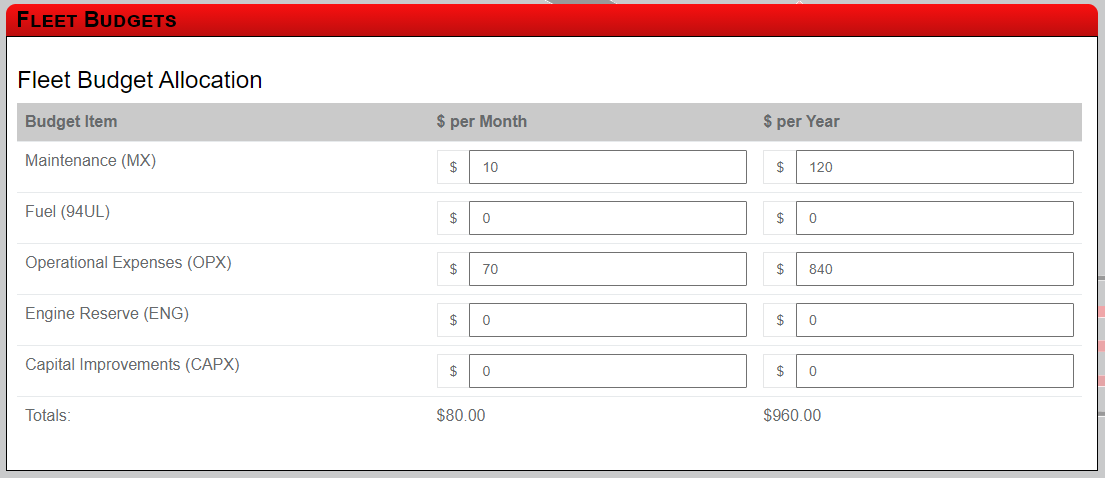
- Fleet Budget: This is where you tell Pilot Partner how to split up each monthly due into different budget. If you were to charge $100 a month for dues, you may want to put $75 into Operational Expenses and $25 into Maintenance.
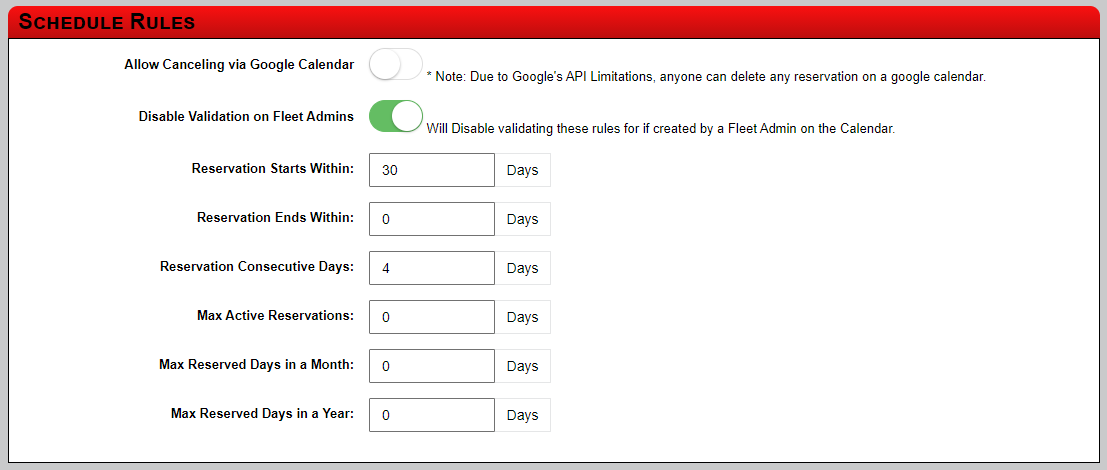
- Schedule Rules: By Default Pilot Partner applies no restrictions to the schedule, but you can adjust the rules for each Pilot Group Separately. Zero (0) means unrestricted.
Trip Types
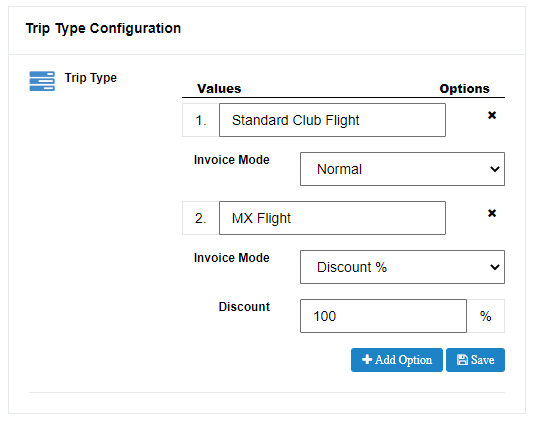
Trip Types is another Simple, yet very Powerful feature of Pilot Partner that gives you a lot of options. Each time a member logs a flight in your fleet, they will have to specify a trip type. When they use more than 1 trip type in a given month, they will receive a separate invoice with flights for each trip type.
We use this in my Partnership to have two different Trip Types that charge Normal rates: Personal Flights & Business Flights. It doesn’t matter to the club, but as a member, I get two different invoices and I can submit the Business Flight Invoice to my Company to be reimbursed.
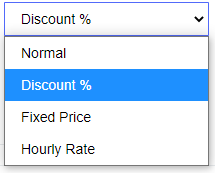
Giving Discounts for MX Flights
Trip Types can also be used to give discounts (include a 100% discount) for any Maintenance Flights. Simply Add a Trip Type Called MX Flight and set it to discount 100%.
Note, all members in your club can select this MX Flight. Should a member select this by accident, catch it in your review before you generate your invoices. Contact the Pilot and tell them to edit their flight and select the correct trip type. Unless you skip reviewing flights before generating invoices, no one will be able to get a discount they don’t qualify for.
Initial Settings with Budgets
Getting the most our of the Pilot Partner Budget system is a topic for its own how to article. By default we make the following standard budget categories for all new fleets: Maintenance, Operational Expenses, Engine Reserve, Aircraft Fuel. You can edit these and add more if you wish.
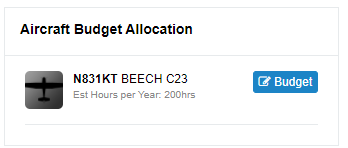
Applying Hourly Aircraft Rates to Budgets
- Click Budgets on the Left Navigation
- On the Right Side you will see a “Budget” button for each Aircraft
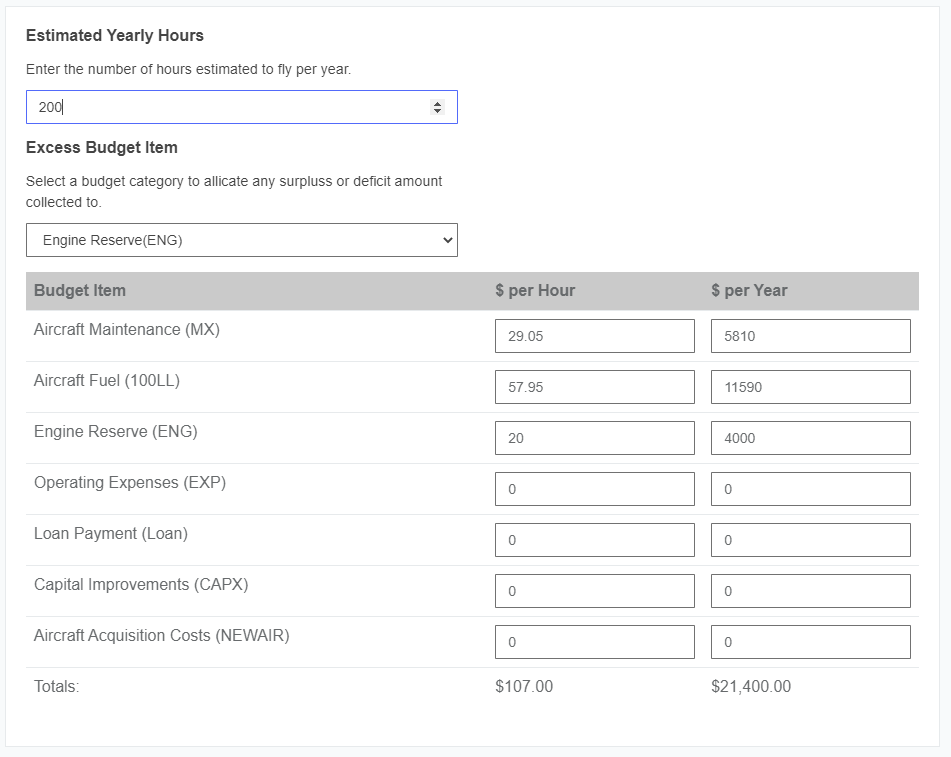
- Enter the amount for each Flight Hour for Each Budget
- Typically Maintenance and Engine Reserve
Estimate Hours Per Year
Excess Budget Item
Inviting & Managing Your Members
Once you have your Fleet Configured and Ready, it is time to start Inviting your members to Join Pilot Partner and your Fleet.
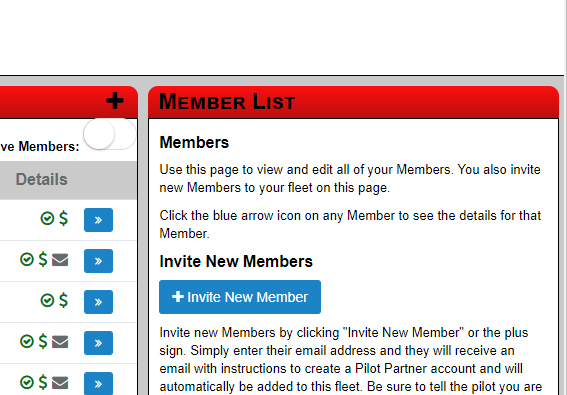
- Click Members on the Left Navigation
- Click the Plus Sign or the Blue “Invite New Member” Button
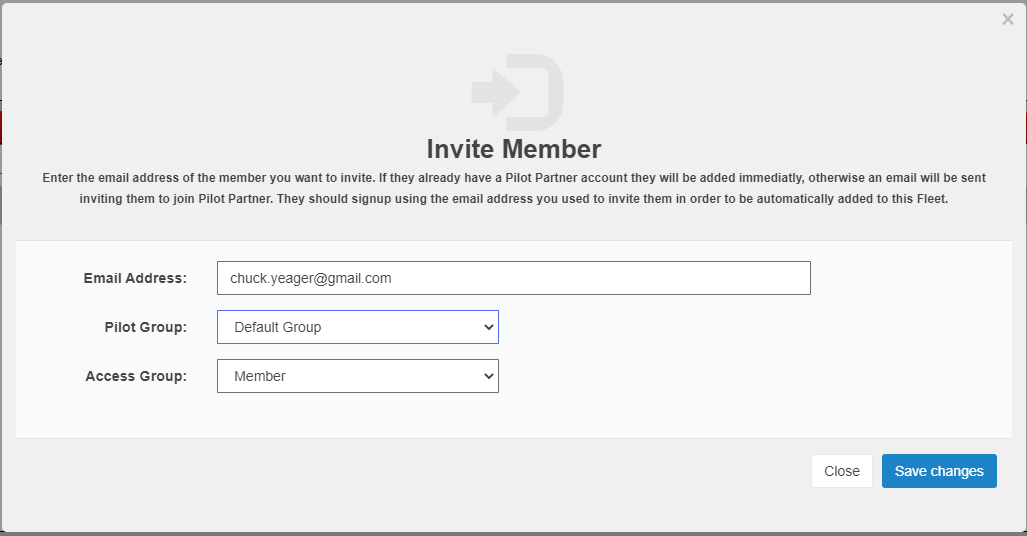
- Enter the Member’s Email Address
- Choose Which Pilot Group they will belong to
- Choose their Access Group: Member or Admin
If your Member Doesn’t Have a Pilot Partner Account
This is the most common case, the Member will receive an email inviting them to join Pilot Partner and your Fleet. As long as your member clicks the link in the email or signs up using the exact same email address you invited, they will automatically be added to your fleet.
If your Member already has a Pilot Partner Account
Pilot Partner will skip sending the member an invite email and will instantly add them to your member list. No action is required on your users part, they can start logging flights with your Fleet Aircraft.
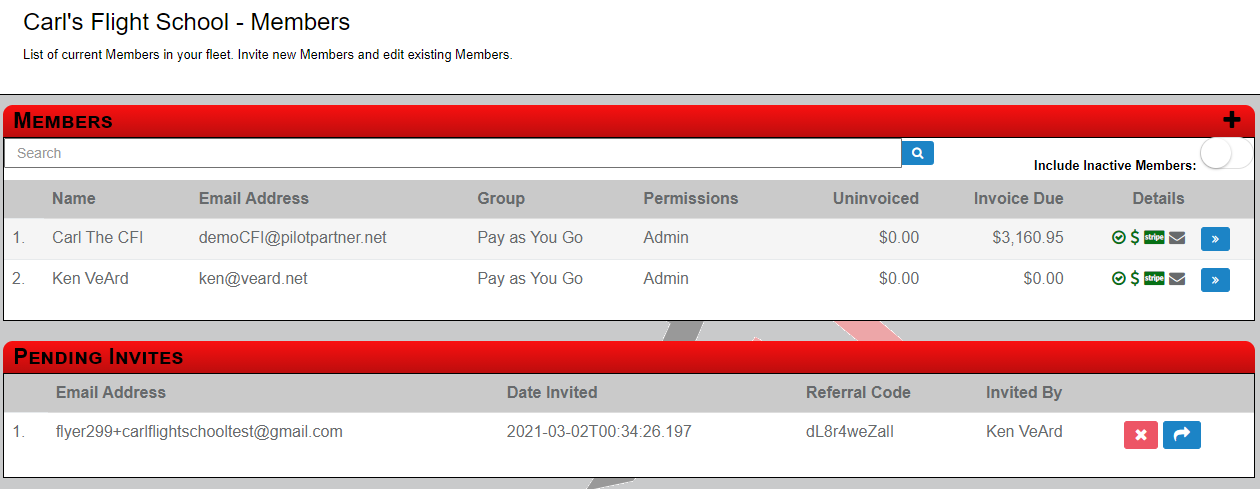
Viewing Pending Invites
It is important to keep track of all of the members who have been invited but have not accepted yet. You will see the list of Pending Invites on your Member Dashboard and will be able to resend or cancel an invite.
Note: Pilot Partner can not charge monthly dues or provide access to the aircraft schedule until the member accepts the invite.